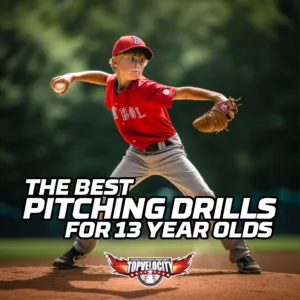
 Are you searching for the best Pitching Drills for 13 Year Olds? This is the article for you!
Adolescent baseball athletes, particularly those in the developmental stage of 13 years old, find themselves at a pivotal juncture in their athletic trajectory. The evident eagerness displayed by individuals to enhance their abilities is notable, particularly considering the formative stage of their athletic development, during which fundamental tactics can significantly shape their prospects in the field. In order to facilitate this critical phase, it is imperative to incorporate targeted pitching exercises that are customized to address their individual developmental requirements.
TopVelocity acknowledges the importance of this stage of development and has carefully designed a collection of training routines that are supported by empirical research. The collection of "Pitching Drills for 13 Year Olds" that we have curated not only encompasses various techniques but also serves as evidence of our commitment to fostering the development of youthful talent. The purpose of these workouts is twofold: to enhance the players' performance on the pitching mound and to prioritize safety. By engaging in these drills, athletes can optimize their inherent strengths while minimizing the likelihood of sustaining injuries.
The Importance of Tailored Pitching Drills for 13 Year Olds
During adolescence, individuals experience substantial physiological changes as they transition from childhood to adolescence. This phenomenon is particularly evident among athletes, and the realm of baseball is no exception. During adolescence, pitchers have significant transformations in their physical attributes, as well as their coordination, strength, and cognitive strategies related to the sport, all of which occur around the age of 13. The numerous changes require training that is carefully tailored to address their specific requirements.
It is not feasible to employ identical training exercises for young aspirants as those utilized for experienced people. The muscle, flexibility, and bone structure of individuals undergo continuous evolutionary changes. Tailored exercises, such as those created by TopVelocity, play a vital role as they specifically address these subtleties, guaranteeing that the instructed strategies are suitable for developmental progress. This entails prioritizing exercises that facilitate the development of core strength, improve agility, and encourage correct biomechanical movements, while also being mindful of the risk of overuse injuries.
Moreover, it is imperative to acknowledge the psychological dimension of training. During adolescence, individuals at the age of 13 undergo a significant period of self-identity and self-confidence development. The utilization of age-appropriate drills instills a sense of confidence in individuals, as it assures them that they are progressing appropriately and establishing a solid groundwork for their future endeavors within the realm of their chosen sport. Age-specific drills encompass more than just physiological fitness; they aim to foster the holistic development of a young pitcher's cognitive, physical, and emotional dimensions.
3X Before Front Foot Strike: Pitching Drills for 13 Year Olds
This pitching drill, known as "3X Before Front Foot Strike," will enhance your lower body's power and coordination, a critical element for pitchers and position players alike. Let's break it down step by step for easy understanding:
- Positioning:
- Start by taking a full stride or about 80-90% of your height if you're a pitcher. If you're a position player, aim for slightly less than 80% since their throws are generally quicker.
- Begin in a pitcher's stance.
- Ground Setup:
- If you have the King of the Hill plate, place it beneath your feet. Alternatively, Velo Pros can also be useful for this drill.
- If you're on grass or dirt, listen for your back foot's drive and drag sound.
- Initial Stance:
- Keep your chin behind your belt buckle and ensure both your eyes are level.
- Maintain this position throughout the drill.
- Lift and Shift:
- Lift your lead foot and shift your weight to the back leg. Make sure all your weight is on your back foot.
- Move Forward and Down:
- Fall forward and downward at the same rate.
- As you move, ensure your trunk remains loaded and does not lean forward.
- Pop the Plate:
- Just before your front foot lands, extend your back leg to "pop" the King of the Hill plate (if you're using it). This action should make a sound.
- If you're not using a plate, listen for the back foot's drive and drag sound just before the front foot lands.
- Final Position:
- Your hips should feel like they're popping up, and your front leg stabilizes.
- Keep everything loaded back.
Key Points to Remember:
- It's essential to keep a low center of gravity. This ensures the force you generate pushes towards the target, not upwards.
- Listen for the plate pop or back foot sound to gauge timing. It should occur just before the front foot strike.
- This drill focuses on the lower half of your body. Make sure you don't transfer your trunk forward.
By practicing this drill regularly, you'll master the "3X Before Front Foot Strike" technique, enhancing your pitching or throwing capabilities while staying safe.
3X Drive Drills: Pitching Drills for 13 Year Olds
Mastering the 3X Drive Drills will help you boost your pitching power. Let's dive into the simple steps you can follow to master this exercise:
Materials Needed:
- A cone
Setting Up:
- Begin at your starting point, like a pitcher's rubber.
- Count 20 steps forward. This should be about 20 feet, but if your shoe size is small, you might want to measure it with a ruler. This distance challenges you to make a stride length of over 6 feet, which is an elite level.
Steps to Perform the 3X Drive Drill:
- Start Position:
- Stand in a full stride position.
- Put most of your weight on your back leg.
- Your feet should be on their balls, and your chin should be back.
- Remember, your feet should be open since this drill is only about the lower half; there's no rotation.
- First Drive:
- Lift, load, and then fall forward and down.
- Make your first drive powerful and explosive.
- Step Up (No Crossing):
- After your first drive, step your back foot to your front foot's heel. Make sure your feet don't cross over each other.
- Subsequent Drives:
- Load and go again. You should go: drive, step up, drive.
- Don't stop between drives. Keep using your momentum to go forward.
- Aim for the Distance:
- Continue with the drive steps until you reach the cone 20 feet away.
- If you don't make the distance, go back to the start and try again.
Important Tips:
- This drill focuses on building propulsion energy. This energy starts from the back leg and propels you through your stride to your front leg.
- Avoid stopping in between. If you stop your momentum, you'll have to restart, and that'll work against you.
- If you're struggling, check if your front leg is reaching too much or if you're not getting low enough. The key is to stay low and focus on building your stride length.
Variation:
- You can also perform the 3X Drive Drills with throws.
- Like before, you'll lift, fall forward, and down, and then make three drives. But this time, after the drives, you'll make a throw.
With regular practice of the 3X Drive Drills, you'll develop excellent propulsion power, making your strides more effective and powerful. Happy practicing!
3X Crossovers: Pitching Drills for 13 Year Olds
The 3X Crossovers are fun drills to boost your pitching skills. Let's learn them step by step. They might seem tricky at first, but with practice, you'll master them!
Starting Position:
- Begin in a straight position, but opposite to how you normally stand when you throw. If you're used to having your right foot up for throwing, start with your left foot forward.
- Your throwing arm should be opposite to your front foot. For example, if your left foot is forward, your right arm is ready to throw.
Steps to Perform the 3X Crossover Drill:
- Elbow and Knee Touch:
- Start with your feet straight.
- Touch your back knee and lift your elbow all the way up and back.
- Turn and Line Up:
- Turn as much as you can against your hip rotation.
- Try to line up your glove side by raising your elbow to shoulder height.
- Pinch back as far as you can.
- The Throw:
- Now, turn your body.
- Push your trunk forward.
- Lift your elbow up.
- Make your throw!
- Advanced Version (Feet Close):
- Once you're good with the basic version, bring your feet closer.
- As you move your arm up and around, balance on the ball of your feet.
- Swivel your feet and make the throw.
Variations with Different Balls:
- Medicine Balls:
- Using medicine balls can make the drill tougher.
- Whether your feet are straight or close, touch your knee, swing your arm up and around, pinch back, and then throw.
- Footballs:
- The goal here is to get a good spiral at the end.
- Lift your arm, line it up like it's your glove side, pinch your elbow back, then make the throw, focusing on good pronation.
- Baseballs:
- Follow the same steps as above, but with a baseball.
Remember:
- Always aim to throw around 45 feet.
- You can practice using baseballs, medicine balls, and footballs with different foot positions.
With time and practice, the 3X Crossovers will become second nature. The key is repetition and making sure you're turning, lining up, and throwing correctly. Keep practicing and have fun!
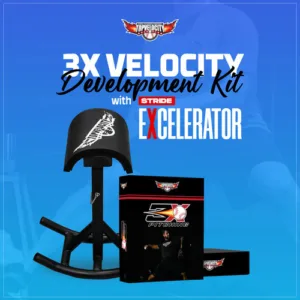
Introducing the Stride Excelerator!
Hello young athletes! Want to level up your pitching or fielding game? Let me introduce you to the cool Stride Excelerator. This tool will help you move better and cover more ground. Here's a simple guide to understanding and using it:
1. Picking Your Stride Excelerator:
- It comes in two sizes: adult and youth.
- Each size comes in different colors too.
- The adult one is bigger, but there's a clear size difference to spot.
2. Adjusting Your Tool:
- Both sizes are adjustable. There's a pin you can pull, and it will move up or down.
- Once set, they both stand firm and stable.
3. What's the Stride Excelerator For?
- It helps pitchers and players get lower in their movements.
- This means your legs and body get in better positions to move forward, sideways, or to field a ball.
4. Who Should Use Which Size?
- If you're around 5'9" to 5'11", you might want to try the youth model.
- If you're closer to 6 feet or taller, go for the adult size.
5. Weight and Portability:
- They're sturdy but not too heavy, around 20 pounds.
- You can pack them in a big bag or luggage if you want to take them with you.
6. How to Use It:
- You can use the Stride Excelerator on the mound or on flat ground.
- The best part? You can actually throw while standing on it! It helps you practice staying low and powerful in your moves.
7. For Position Players:
- This tool isn't just for pitchers. If you're a position player, it helps you stay low and focused when you field and throw.
- You can swivel and drive with it, making your throws even better.
Want to Know More? If you're curious and want to dive deeper, check out topvelocity.net and search for "The Stride Excelerator."
In a nutshell, the Stride Excelerator is a super tool that helps you move better, pitch stronger, and field sharper. Give it a try and see the magic happen!
 🔥 Boost Your Game with the Stride Excelerator! 🔥
 🔥 Boost Your Game with the Stride Excelerator! 🔥
Are you ready to step up your pitching and fielding skills? Dive into smoother strides and powerful throws with the ultimate training tool: the Stride Excelerator.
🚀 Don't miss out! Grab yours TODAY at topvelocity.net/excel and transform the way you play. Let's elevate your game to the next level! 🚀

FAQs: Pitching Drills for 13 Year Olds
Q: Why are these drills tailored for 13-year-olds?
A: These drills are designed considering the unique growth spurts, biomechanical changes, and developmental stages of 13-year-olds. They ensure safe and optimal training that matches their physiological and psychological readiness.
Q: How often should these drills be practiced?
A: Consistency is essential for skill development. A good guideline is practicing 3-4 times a week. However, it's crucial to balance rigorous practice with adequate rest to prevent overuse injuries and ensure muscle recovery.
Q: Can these drills be practiced without the Stride Excelerator?
A: Absolutely! These drills can be practiced without the Stride Excelerator. However, using the Stride Excelerator can significantly enhance the effectiveness of the drills, ensuring pitchers get the most out of their training sessions.